Creating A Wallet
To get started in the Telos ecosystem you’ll need a cryptocurrency wallet. A wallet allows you to securely store your assets and interact with dApps (Decentralized Applications) within the Telos ecosystem.
Wallet Options
We will be going over two different options for wallets on Telos. Each wallet is recommended based on your experience and comfort level with crypto.
MetaMask (Telos EVM)
MetaMask is an industry-standard and is used across all EVMs. If you have experience in crypto or already use MetaMask, then this is a great option for you.
Anchor (Telos Zero)
Anchor is the most popular wallet signer for Telos Zero. If you are more advanced in your crypto knowledge or want to take full advantage of the power that Telos has, this is a great option for you.
MetaMask
Telos EVM fully supports MetaMask, a leading wallet for Ethereum based blockchains.
Step I - Install MetaMask
- Head over to MetaMask
- MetaMask is compatible with multiple browsers, iOS & Android.
Be attentive to each install tip that MetaMask may give.
Be sure to save and safely store any and all private keys/seed phrases during the MetaMask install. If your private key/ seed phrase is lost or stolen you lose control over your account and wallet. Please keep your key/s safe!
Step II - Import The Telos EVM RPC
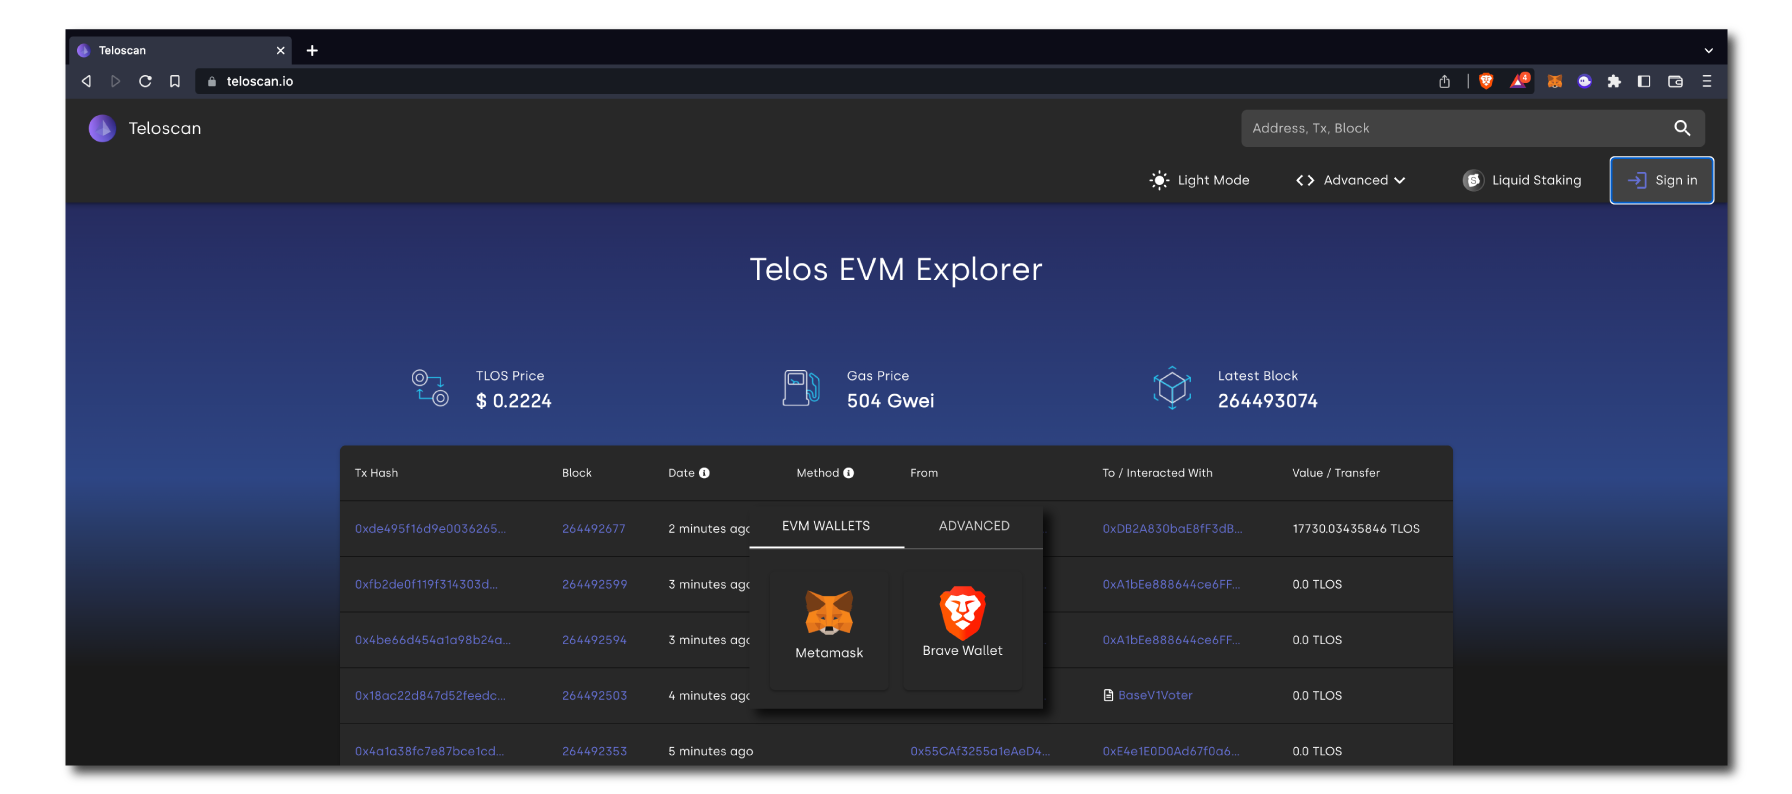
- Head over to teloscan
- Click "Sign in" on the top right corner of the page.
- Select MetaMask
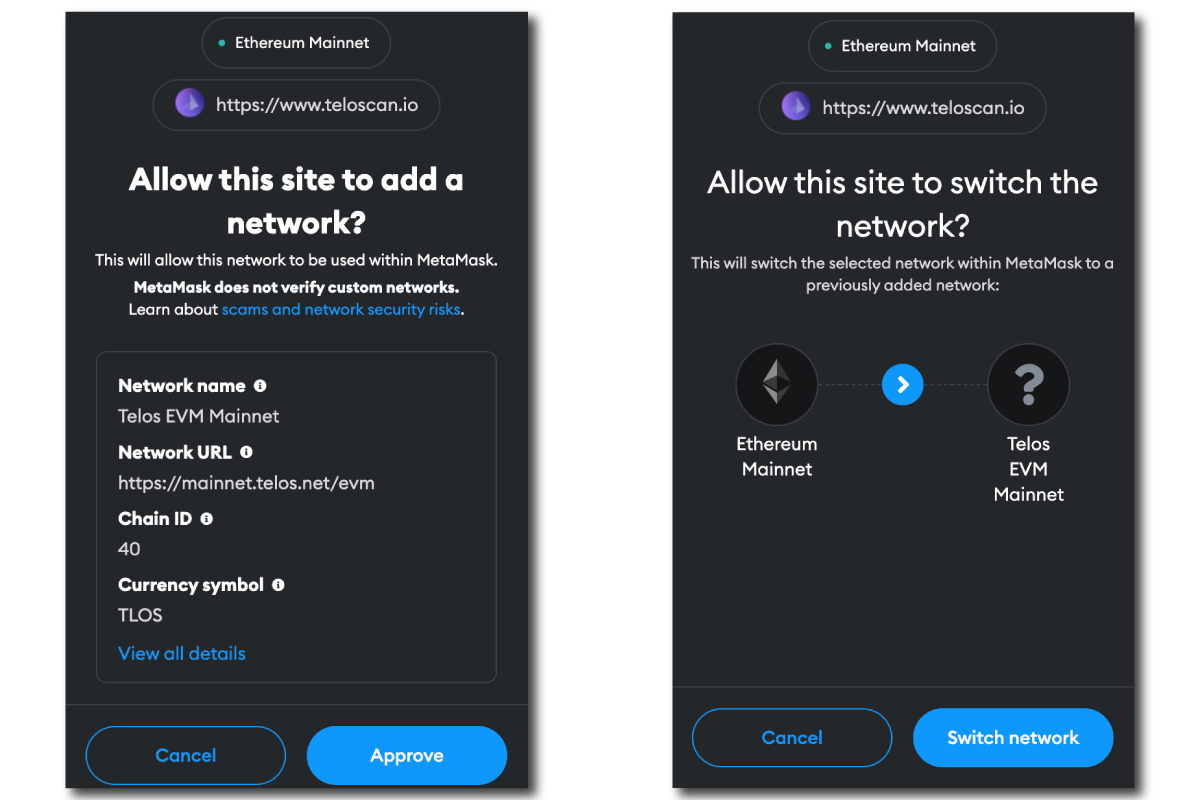
- Click "Approve" to add the tEVM network to your MetaMask wallet.
- Click "Switch network" If you'd like to swap over from your current network to the tEVM network.
With the network added you can now enjoy what the tEVM ecosystem has to offer! We are sure you'll love the instant speeds, cheap transactions and the lack of front running.