ERC721 NFT
This section will explain how to write an NFT minting smart contract that encapsulates all of the logic based on the NFTs you want to mint, followed by hosting images and metadata on decentralized file storage.
Setup Local Dev Environment
Prerequsites follow this link NodeJS version 16 or Hardhat is not already installed on your device.
NodeJS version 16 or less is mandatory.
First, initialize a local project and install Hardhat tools for testing, compiling, and deploying smart contracts.
Open a terminal and proceed to the directory you want to create an NFT minter.
mkdir telos_nft_minter
cd telos_nft_minter
npm init -y
npm install --save-dev hardhat
Hardhat Setup Walkthrough
npx hardhat
Select "create a sample project" and press "return" to bypass all the questions asked in the terminal. The system will then ask you to install hardhat-waffle and hardhat-ethers. These are the plug-ins utilized to test and deploy smart contracts.
If not installed then download here
npm install --save-dev @nomiclabs/hardhat-waffle ethereum-waffle chai @nomiclabs/hardhat-ethers ethers
Using the OpenZeppelin contracts Library API
Benefits: Reusable Solidity components to build custom contracts, contracts are audited, flexible role based permissioning scheme
npm install @openzeppelin/contracts
Solidity ERC721 Smart Contract
The first step is to write a smart contract in a .sol file under the contracts folder.
// SPDX-License-Identifier: UNLICENSED

pragma solidity ^0.8.1;

// Imports
import "hardhat/console.sol";
import "@openzeppelin/contracts/token/ERC721/extensions/ERC721URIStorage.sol";
import "@openzeppelin/contracts/utils/Counters.sol";

// Contract inherits methods from ERC721 Contract OpenZeppelin Library.
contract TelosNFTMinter is ERC721URIStorage {
    // Using Counter Method to keep track of token Ids.
    using Counters for Counters.Counter;
    Counters.Counter private _tokenIds;


    // Pass name and symbol to ERC721 contract.
    constructor() ERC721 ("TelosNFT", "SURF") {
    }
    // Mint function for users to get their NFT.
    function mintNFT() public {
        uint newItemId = _tokenIds.current();

        // Mints NFT to the sender using msg.sender global variable
        _safeMint(msg.sender, newItemId);

        // This sets the NFT metadata put a photo of your favorite pet for now...
        _setTokenURI(newItemId, "insert JSON url here");

        console.log("#%s NFT has been minted to %s", newItemId, msg.sender);

        // This uses the Counters method inherited by Open Zeppelin library
        _tokenIds.increment();
    }

}
Setting up a run.js File in Hardhat Project
A run.js file is set up to use a local instance of the blockchain created by Hardhat. This enables developers to test their contracts to ensure they are compiling and the overall dApp runs as intended.
const main = async () => {
  const nftContractFactory = await hre.ethers.getContractFactory(
    "TelosNFTMinter"
  );
  const nftContract = await nftContractFactory.deploy();
  await nftContract.deployed();
  console.log("Contract deployed to:", nftContract.address);

  // Call the function.
  let txn = await nftContract.mintNFT();
  // Wait for it to be mined.
  await txn.wait();
};

const runMain = async () => {
  try {
    await main();
    process.exit(0);
  } catch (error) {
    console.log(error);
    process.exit(1);
  }
};

runMain();
Deploy on Local Testnet
npx hardhat run scripts/run.js
Deploy on Telos Testnet
To deploy on telos_testnet, wallet credentials must be provided to sign the transaction.
Setup Deploy.js File in /scripts Folder
const main = async () => {
  const nftContractFactory = await hre.ethers.getContractFactory(
    "TelosNFTMinter"
  );
  const nftContract = await nftContractFactory.deploy();
  await nftContract.deployed();
  console.log("Contract deployed to:", nftContract.address);

  // Call the function.
  let txn = await nftContract.mintNFT();
  // wait for contract to be mined .5seconds
  await txn.wait();
  console.log("Minted NFT #1");
};

const runMain = async () => {
  try {
    await main();
    process.exit(0);
  } catch (error) {
    console.log(error);
    process.exit(1);
  }
};

runMain();
Follow steps to deploy on telos_testnet
npm install dotenvTelos utilizes a dotenv plug-in to load environment variables from .env file.
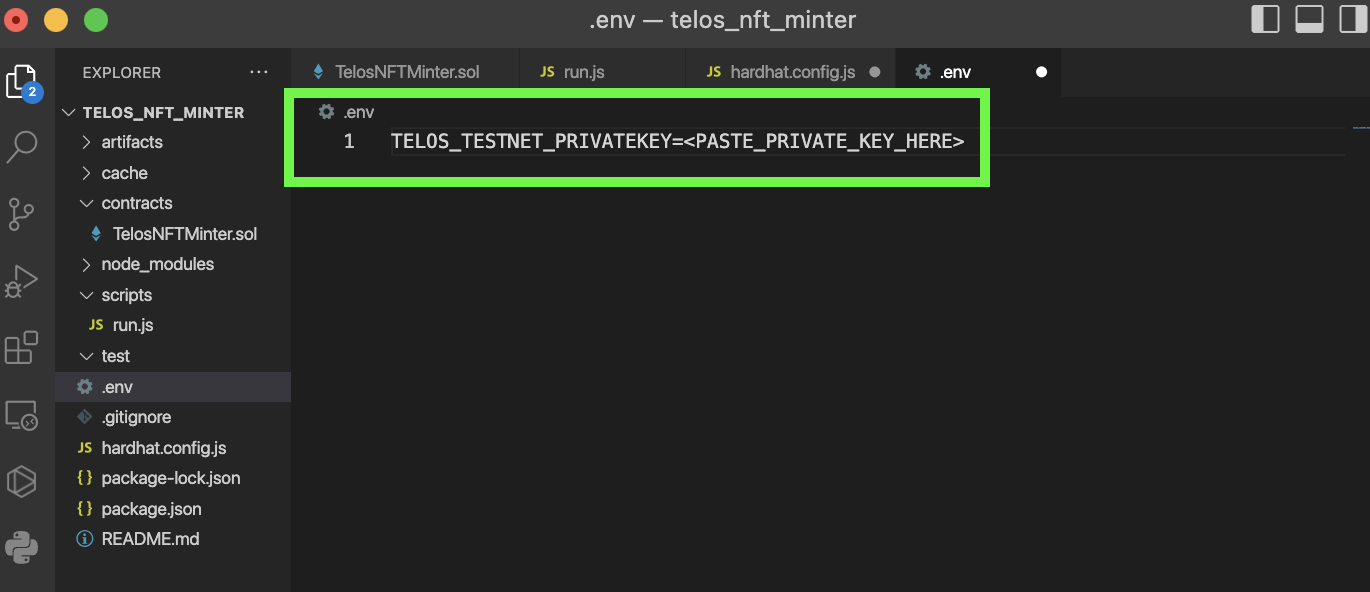
Note .env file contains sensitive information and can be included in .gitignore to follow best practices.- Create a seperate .env file to hide and paste all private keys.

- Open hardhat.config.js file and add the network configuration for telos_testnet.
Make sure to add
require("dotenv").config({ path: ".env" });at the top of file. telos_tesnet rpc = "https://testnet.telos.net/evm" accounts: [process.env.TELOS]
require("@nomiclabs/hardhat-waffle");
require("dotenv").config({ path: ".env" });

module.exports = {
  solidity: "0.8.1",
  networks: {
    telos_testnet: {
      url: "https://testnet.telos.net/evm",
      accounts: [process.env.TELOS_TESTNET_PRIVATEKEY],
    },
  },
};
run npx hardhat run scripts/deploy.js --network telos_testnet
After completing these steps you will have minted an NFT using hardhat on the Telos Testnet.